
Construct X Group

Greenwich, SE10 · Victorian terrace

A modern loft built around the original brickwork.

The homeowners bought this Victorian terrace to renovate over time. Finishing the loft first gave them a bedroom and wet room while they worked downstairs. The goal was to create a modern space while keeping the original brickwork that gave the house its character.

Space created
Master bedroom and wet room
Est. cost (inc. VAT)
£98,000+
Time taken
14 weeks
Added area
31 sqm
Project type
L-shaped dormer loft conversion
Planning route
Permitted development + LDC

The transformation

How the home changed

The house had two roof areas: the main roof and a smaller section above the rooms at the back. By extending both, we created enough space for a master bedroom and separate wet room on the new top floor.

Before

Original roof space.

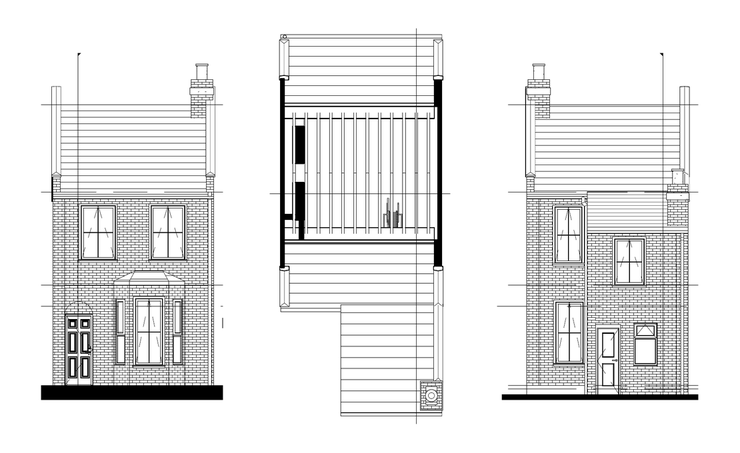
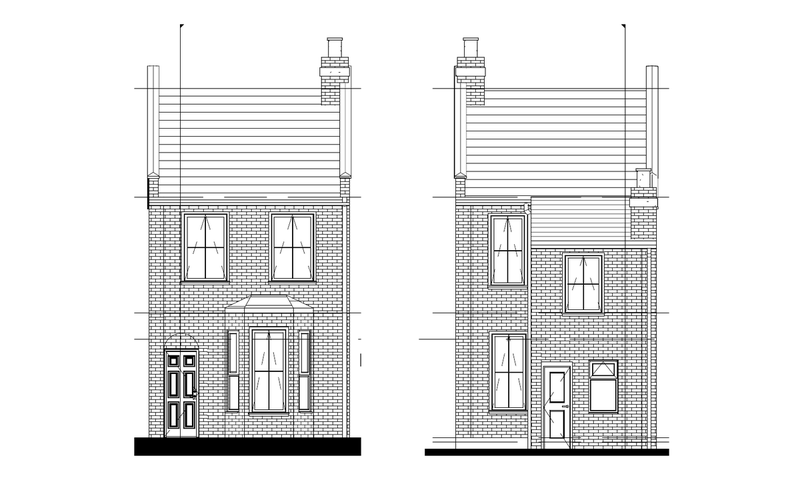
Existing roof layout before the Greenwich L-shaped dormer loft conversion.

After

Master bedroom and wet room.

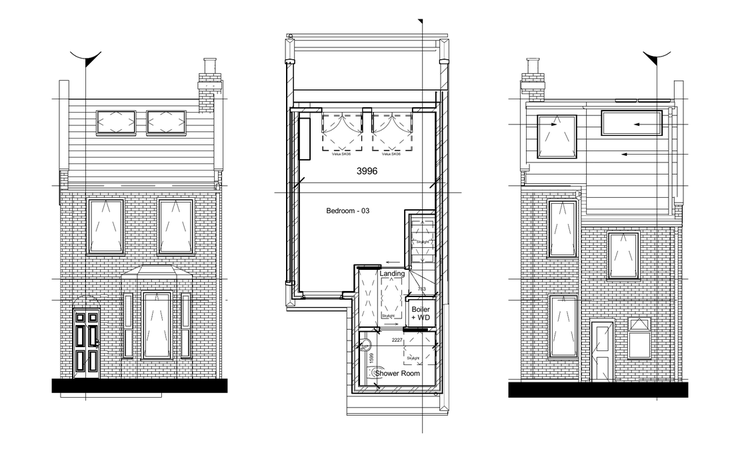
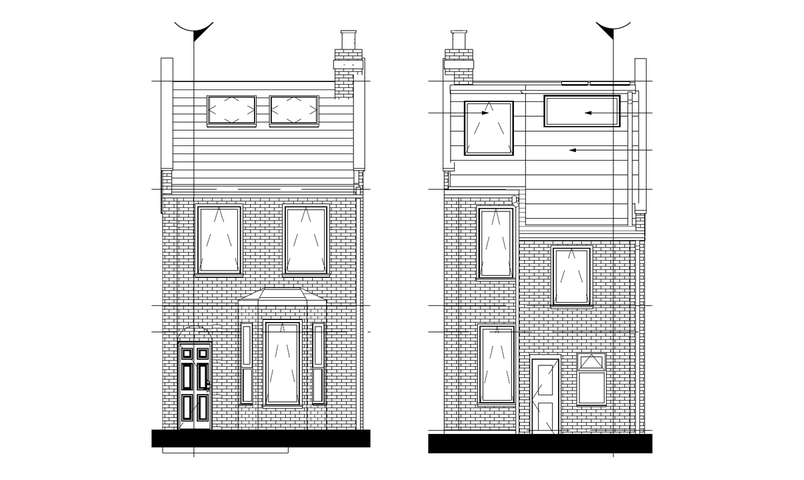
Proposed L-shaped dormer floor plan showing the bedroom, staircase and wet room.
  1. New roof & rooflights
  2. Master bedroom
  3. Wet room
  4. Main roof dormer
  5. Back section dormer
  6. Chimney removed

The larger part of the loft became the bedroom, with the wet room positioned above an existing bathroom downstairs. That meant the plumbing and drainage connections were already nearby, making the new bathroom easier to install.

The existing roof also had enough height to create around 2.14 metres of headroom in the main bedroom without lowering the first-floor ceilings. This avoided additional work and disruption to the rooms below.

A new staircase connected the loft to the first floor, and we relocated the boiler into a space between the stairs and wet room.

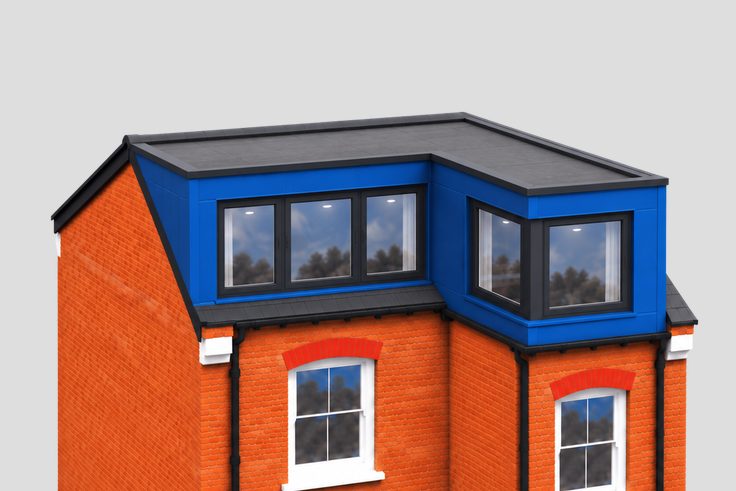
Illustration of a terraced house after an L-shaped dormer loft conversion, with dormers built over the main roof and the rear section, shown in blue.

Design approach

Keeping the character of the original house

Restoring the original chimney

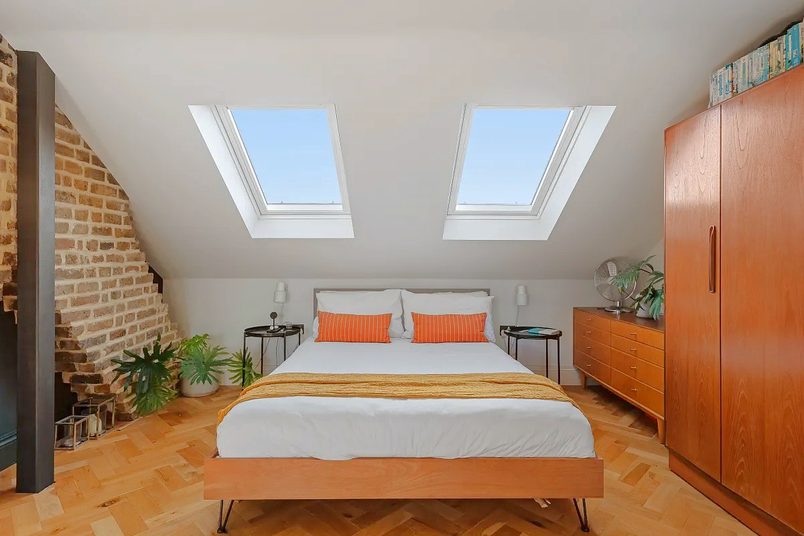
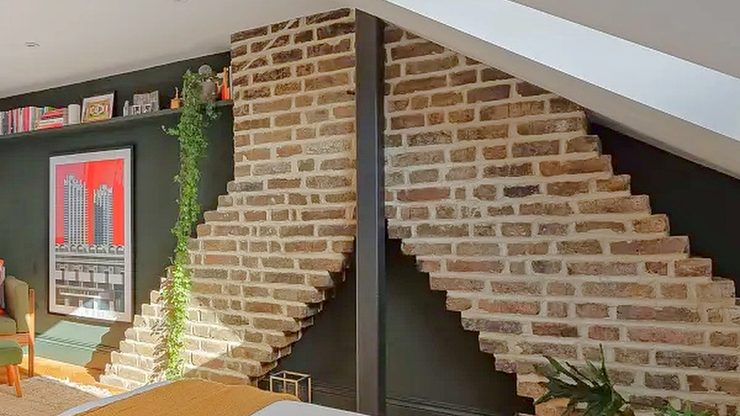
The homeowners specifically asked us to keep the original chimney exposed in their new bedroom.

But some of the bricks were damaged and couldn’t be left as they were.

Rather than replacing them with new bricks that would look noticeably different, our bricklayer reclaimed suitable bricks from other parts of the house affected by the conversion.

We used these to repair the damaged sections and carefully repointed the chimney, keeping the aged appearance the homeowners liked.

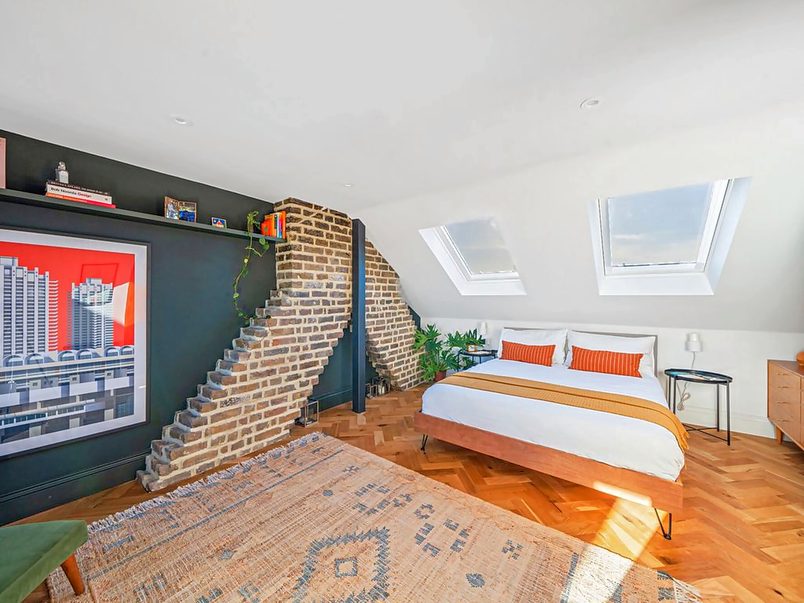
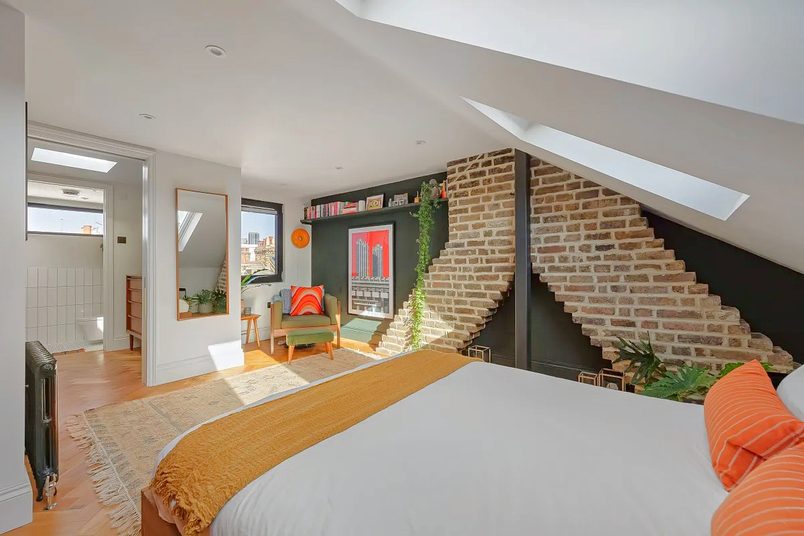
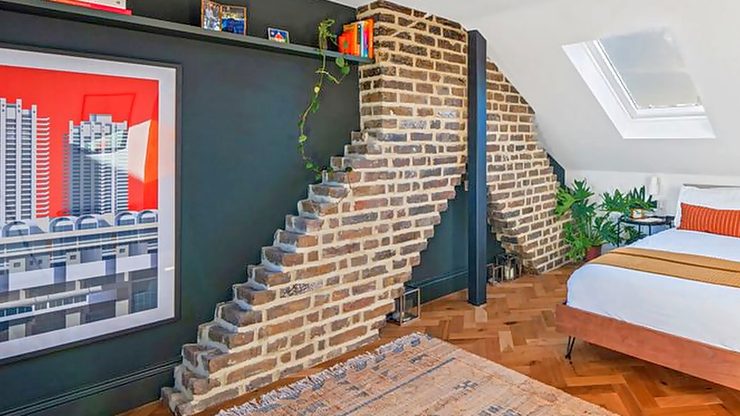
Restored original chimney brickwork retained inside the new Victorian terrace loft bedroom.

Leaving the structural steel exposed

The black steel column beside the chimney wasn’t added for decoration. It supports the new roof structure, which couldn’t safely rest on the original chimney masonry.

Normally, a supporting column like this could be boxed in and hidden from view.

But the homeowners liked the appearance of the exposed steel alongside the brickwork and asked us to keep it visible.

We applied the required fire-protective coating so the column could remain exposed while meeting the necessary fire-safety requirements.

Black structural steel column beside the restored chimney brickwork in the Greenwich loft conversion.

Removing a second chimney to make more room

While one chimney became a feature of the bedroom, another was taking up valuable space in the proposed wet room.

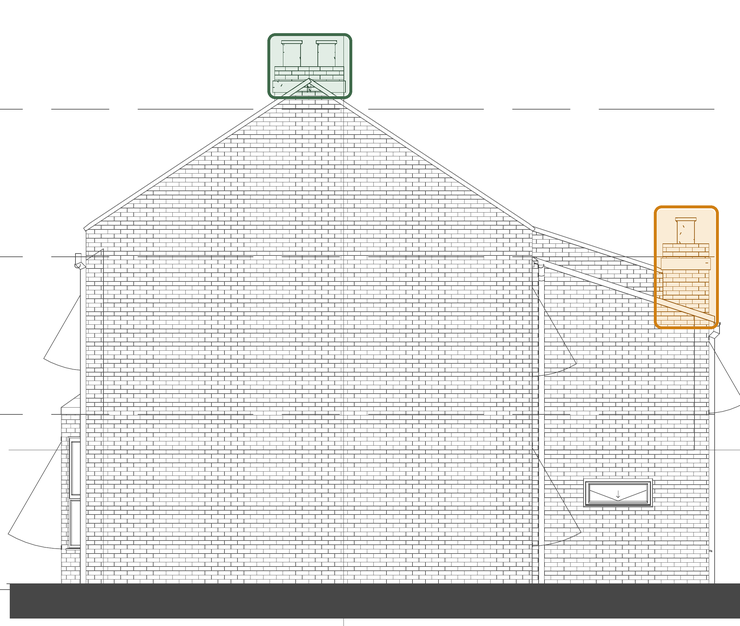
We removed this second chimney breast at loft level, along with the stack above the roof. The remaining brickwork on the floors below was left in place.

This gave us a more usable bathroom layout, without the chimney restricting where everything could go.

The existing side elevation of the house, with the main chimney on the ridge, which was kept, and the second chimney stack at the back, which was removed.

Building the wet room

The homeowners wanted a walk-in shower without a raised tray or step.

We waterproofed the shower area and floor, with drainage built directly into the tiled floor so water could run away without a conventional shower tray.

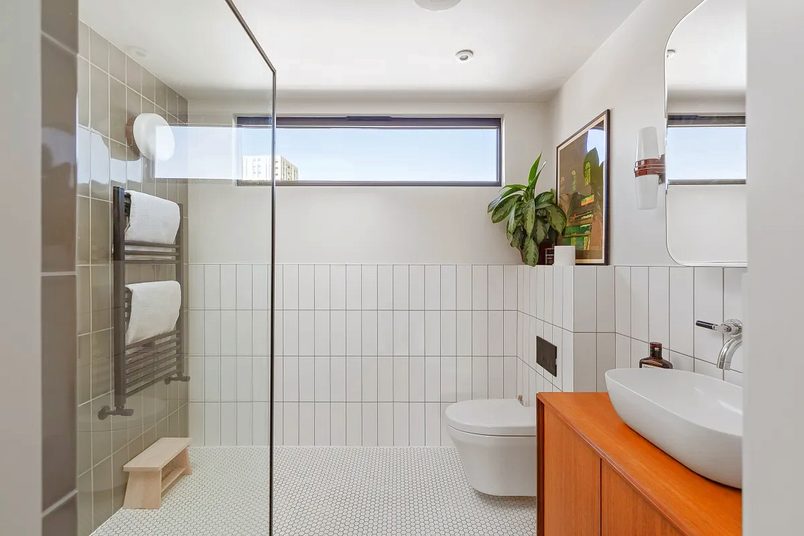
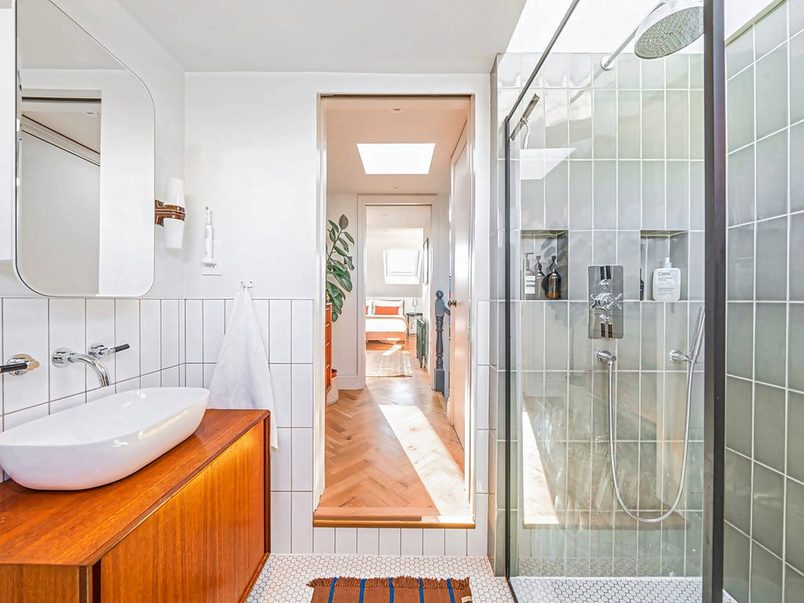
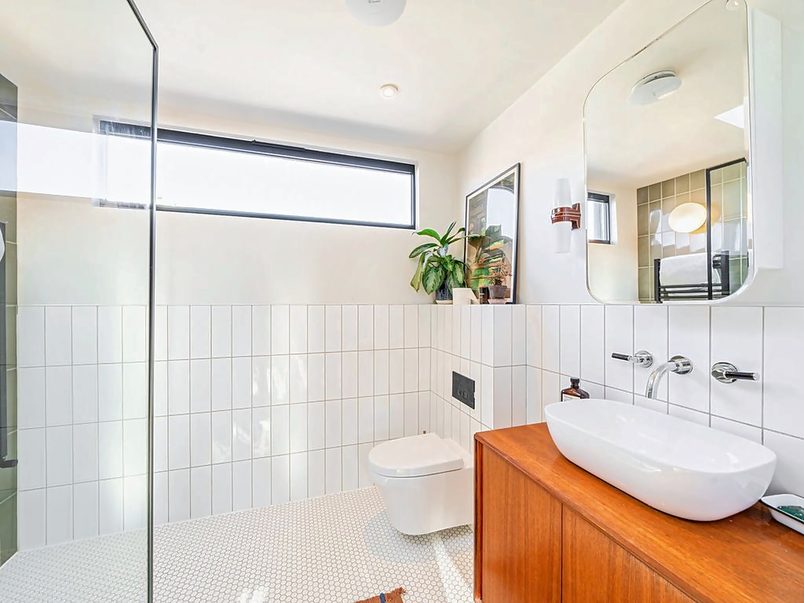
The room also has a skylight above the shower and a long horizontal window, bringing natural light into what could otherwise have been a fairly enclosed space.

The homeowners chose three different tile finishes and asked us to avoid the usual metal or plastic strips on exposed corners. Instead, our tiler carefully cut the tile edges at angles so they met neatly.

They supplied the tiles and bathroom fittings, while we completed the waterproofing, plumbing and installation.

New walk-in wet room with tiled shower, horizontal window and concealed bathroom fittings.Wet-room shower with green tiles, two recessed niches and a rooflight above, with the landing and bedroom seen through the doorway.

The build

Building the loft while the homeowners renovated downstairs

Working around their renovations

The homeowners continued living in the property while we built the loft. At the same time, they were carrying out their own renovation work on the floors below.

We agreed which jobs our team would complete and which the homeowners preferred to do themselves.

Our work covered the structural conversion, new roof and windows, staircase, electrics, plumbing, plastering and fitted wet room.

The homeowners then took care of their bedroom flooring, skirting boards and decorating.

This was how the project had been planned from the beginning, rather than work left unfinished at handover.

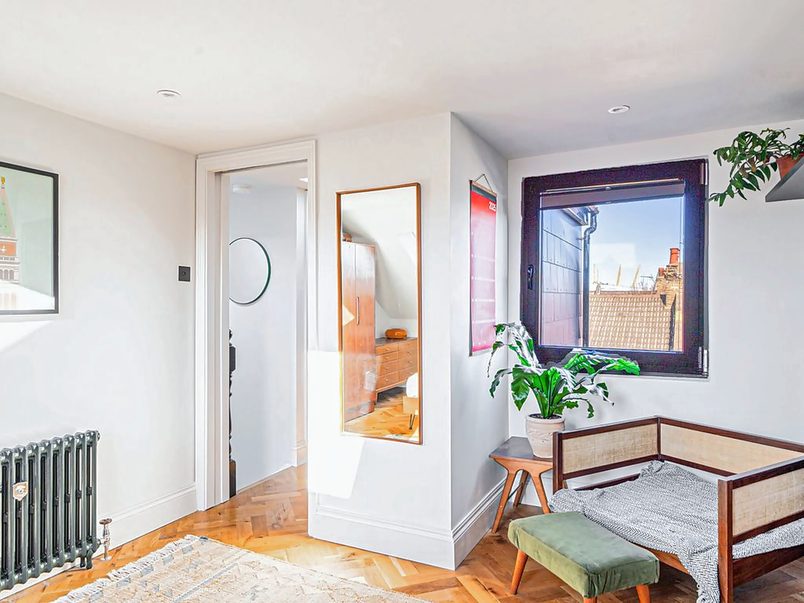
Seating area by the dormer window in the finished loft bedroom, with herringbone flooring and a cast-iron radiator.

Working through the winter weather

Construction started in February 2022, when rain was a particular concern.

The scaffolding on this project didn’t include a temporary weatherproof roof. That meant periods of heavy rain made it difficult to continue working on the exposed roof, contributing to approximately two weeks of interruptions.

It’s an experience that has influenced how we approach winter loft conversions today, particularly when deciding whether temporary roof protection would be worthwhile.

Replacing the front roof during construction

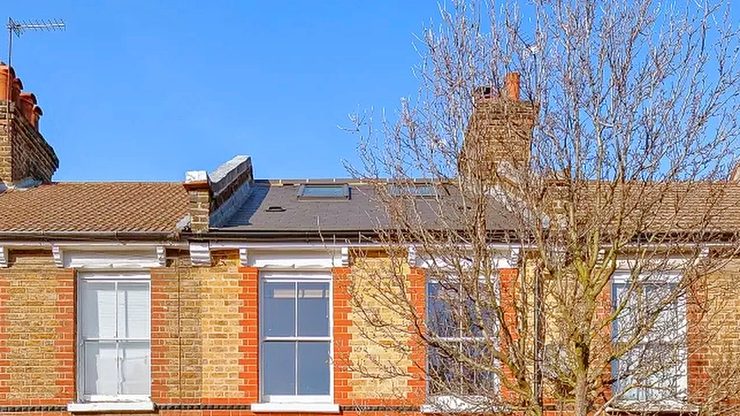
While the conversion was underway, the homeowners also decided to replace the original front roof covering.

This wasn’t part of the initial loft-conversion scope, but with the scaffolding already in place, they chose to have the additional work completed at the same time.

We removed the old roof tiles, battens and membrane, keeping the existing rafters in place. We then installed new membrane, battens and tiles.

Including this additional work meant the homeowners wouldn’t need to arrange a separate front-roof replacement later.

The completed build took approximately 14 weeks, including the weather interruptions and additional roof work.

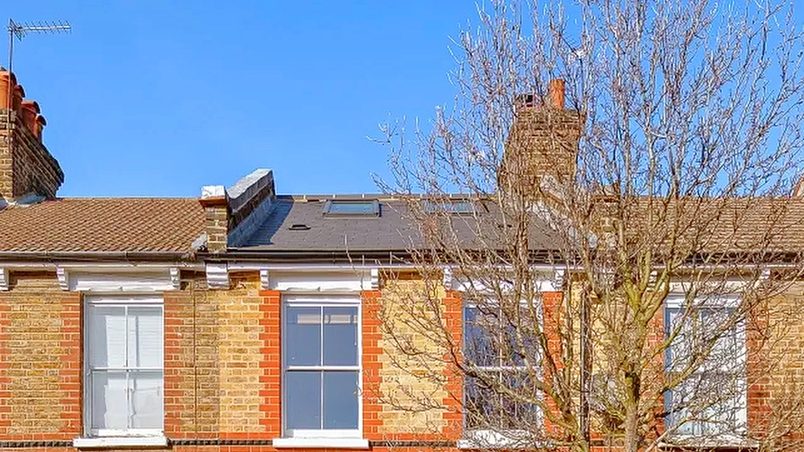
The replaced front roof of the Greenwich Victorian terrace, with its rooflights, seen from the street.

Planning & approvals

What needed approval

The loft conversion was carried out under permitted development, with a Lawful Development Certificate from Greenwich Council. The homeowners also made formal Party Wall arrangements with both neighbours, and the completed work was signed off by Building Control.

Planning permission

Permitted development + LDC

Greenwich Council confirmed that the proposed loft conversion was lawful under permitted development.

Party Wall

Both neighbours appointed the same surveyor

Formal Party Wall arrangements were made with both neighbouring properties.

Building Control

Inspected and signed off

The completed loft conversion received its Building Control completion certificate.

What is permitted development + LDC?

Permitted development allows certain changes to a home without applying for separate householder planning permission, provided the work meets the relevant rules.

A Lawful Development Certificate, or LDC, is the council’s formal confirmation that the proposed work is lawful.

For this project, Greenwich Council issued an LDC before construction began.

Read our permitted development guide →

What is a Party Wall agreement?

Some building work involving a shared wall or structure requires homeowners to formally notify their neighbours before construction begins.

If a neighbour doesn’t consent to the proposed work, surveyors can be appointed to decide how the work should proceed and what protections are needed.

For this project, formal arrangements were made with both neighbouring properties, and both neighbours agreed to use the same surveyor.

Read our Party Wall guide →

What does Building Control do?

Building Control checks that building work meets the relevant Building Regulations.

These include requirements for structural safety, fire safety, insulation and other aspects of construction.

It’s separate from planning permission.

For this project, the loft conversion received its final Building Control completion certificate.

Read our Building Control guide →

Costs today

What this project costs

£98,000+

Estimated base cost today · Includes VAT

What the base price covers

This price includes a rear dormer plus an additional section built over the rear outrigger, the smaller part of the house that extends into the garden.

That extra space can make room for two bedrooms and a bathroom, or a bedroom, bathroom and office, depending on the house.

The core build comes with our workmanship warranty: 10 years on structural work, 5 years on roofing and 2 years on electrical and plumbing work.

What can change the base price

The standard price assumes the usual construction requirements for this type of conversion.

Existing chimneys, additional structural work, changes to the roof, service relocations and more detailed finishes can affect the final price.

We identify these requirements when reviewing the existing house and proposed plans.

What this home added

The Greenwich conversion involved several project-specific decisions.

We restored the original chimney brickwork, left a fire-protected structural column exposed, removed a second chimney to improve the wet-room layout and relocated the boiler.

The homeowners also chose a step-free wet room with detailed tiling.

During construction, they added a separate replacement of the original front roof covering.

What’s included?

L-Shaped Dormer

Typically £98,000+ including VAT

This price includes a rear dormer plus an additional section built over the rear outrigger, the smaller part of the house that extends into the garden.

That extra space can make room for two bedrooms and a bathroom, or a bedroom, bathroom and office, depending on the house.

What’s included

What isn’t included?

Bathroom fittings and tiles, final flooring, decorating and any additional bathroom are separate.

Advice for homeowners

Key project takeaways

Original features don’t always have to go

If there’s something you particularly like about your home, it’s worth discussing how it might be retained before the conversion is designed.

For this project, the homeowners wanted to keep the original chimney. We were able to repair the brickwork and work around it structurally, rather than remove it or cover it up.

But retaining an old feature doesn’t necessarily mean it can support new structural loads. That needs to be considered as part of the design.

Think about where the bathroom will go

Adding a bathroom upstairs is often easier when the plumbing and drainage can connect to existing services below.

Here, placing the wet room above an existing bathroom meant those connections were nearby.

Removing the second chimney also gave the homeowners more freedom over the layout.

Neither arrangement will be possible in every house, but both are worth considering when deciding where a new loft bathroom should go.

Decide what you’ll finish yourself

Some homeowners want their builder to take care of everything. Others prefer to undertake certain finishing jobs themselves.

These homeowners were comfortable fitting their own flooring and skirting boards and completing the decorating.

That arrangement worked because the division of work was agreed in advance.

If you’re planning to finish parts of your own conversion, it’s worth making sure you and your builder understand exactly what will be completed before handover.

Consider how the weather could affect your build

Opening up an existing roof leaves the house vulnerable to the weather until the new structure is protected.

On this Greenwich conversion, winter rain contributed to approximately two weeks of interruption.

Temporary weatherproof roofing can help reduce that exposure, but it adds to the cost of scaffolding.

It’s worth discussing the options before construction starts, particularly if you’re planning an extensive dormer conversion during the wetter months.

Think about the order of a larger renovation

The homeowners chose to complete their loft before tackling the ground floor.

That decision proved useful when we returned to build their side-return extension. They were able to use the completed loft while work continued downstairs.

If you’re planning several major changes to your home, the order you carry them out can make a real difference to how comfortably you can live through the renovation.

Charlie’s full homeowner review

Eddie and Ben and their team did a great job on our loft extension. They were always polite and considerate and a pleasure to deal with. A few minor issues (to be expected during major building work) along the way were dealt with quickly. The final work is to a very high standard and we are delighted with our new space. We would have no hesitation in using them again.

Charlie Raine Google review · · January 2026

See the completed conversion

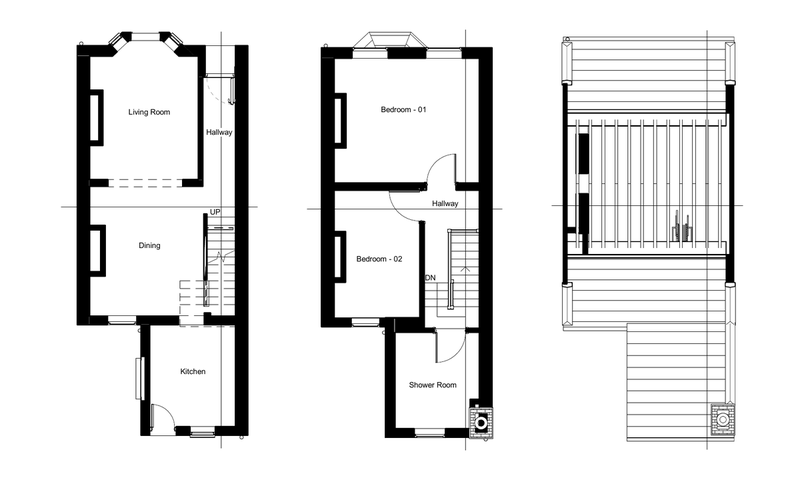
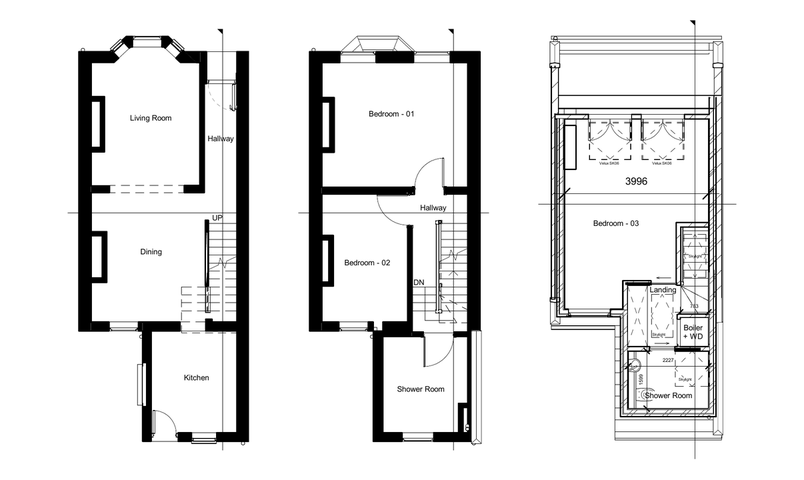
Existing floor plans of the ground floor, first floor and roof before the Greenwich L-shaped dormer loft conversion.Existing front and rear elevations of the Victorian terrace before the loft conversion.

Ready to get a clear plan for your project?

Get a realistic picture of what’s possible for your home, likely costs, timings, planning requirements and what the project would involve.

You’ll speak with Eddie

Managing Director

Delivered this project

Expert advice · No obligation

Keep exploring

See more transformations

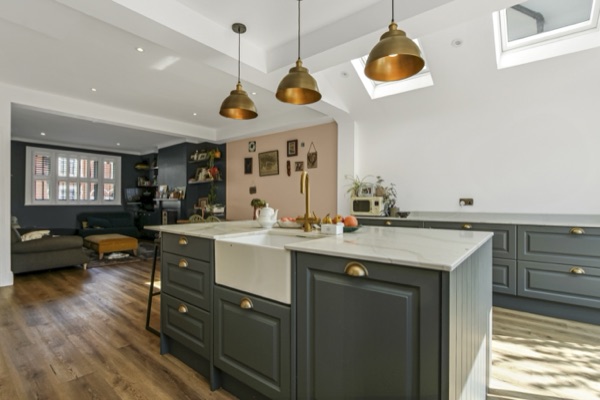
Open-plan kitchen with a grey island, brass pendant lights and roof windows, open to the living room

Lewisham, SE6 · Victorian terraced

An open-plan ground floor to reconnect a family.

Whoever was cooking was often cut off from the rest of the family. Opening up the kitchen, dining room and side return brought everyone together.

Est. cost
£75,000+
Time taken
12 weeks
Added area
11 sqm
Read the case study: An open-plan ground floor to reconnect a family.
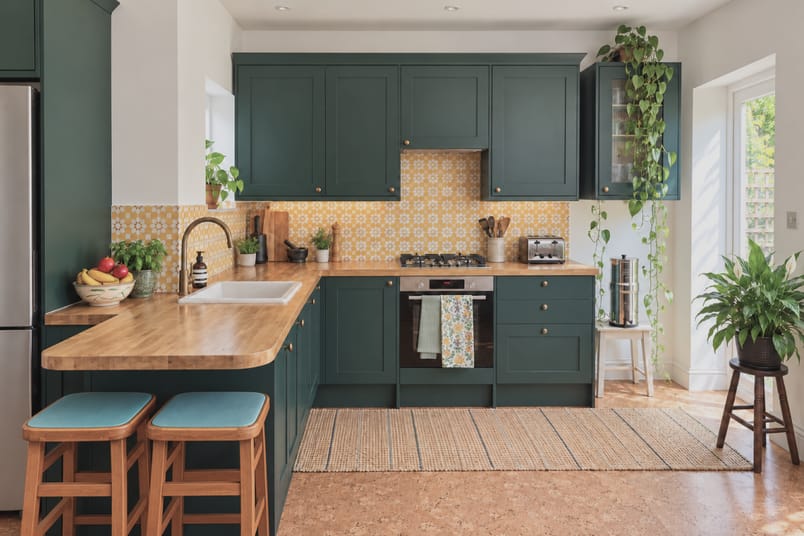
Dark green kitchen with a wooden worktop peninsula and two stools, a patterned yellow splashback and a door out to the garden.

Clapton, E5 · multi-floor FLAT

Moving a kitchen upstairs to create a family hub.

This family’s flat had limited space to begin with, and they needed their kitchen closer to the main living space and a bigger family bathroom.

Est. cost
£69,000+
TIME TAKEN
12 weeks
ADDED AREA
6 sqm
Read the case study: Moving a kitchen upstairs to create a family hub.
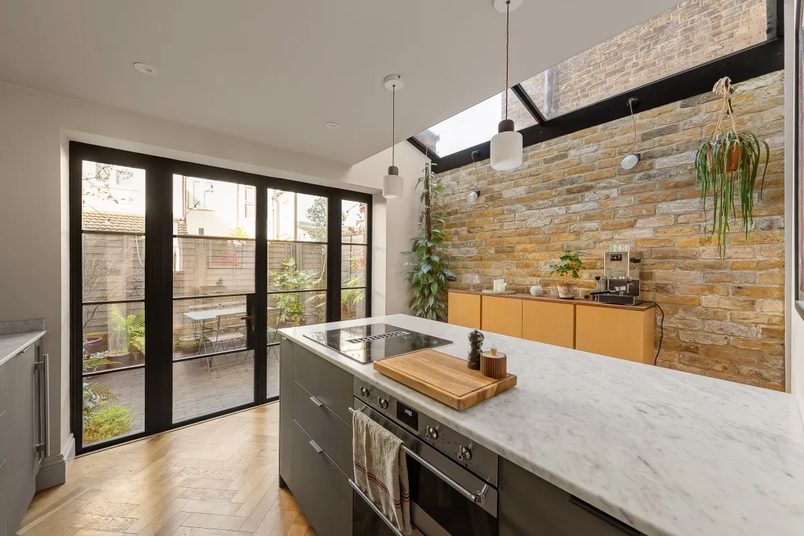
Completed side-return kitchen extension in Greenwich, with a central island, pitched glass roof and exposed brick wall.

Greenwich, SE10 · Victorian terrace

Reworking the ground floor around a wider kitchen.

A side-return extension gave this narrow kitchen enough width for a central island, with a glass roof bringing daylight into the new space.

Est. cost
£74,000+
Time taken
12 weeks
Added area
5 sqm
Read the case study: Reworking the ground floor around a wider kitchen.

What is an L-shaped dormer?

An L-shaped dormer is a loft conversion that extends over two connected roof areas.

One dormer extends from the main roof, while another extends above the smaller section at the back of the house.

Together, they create more standing room and usable floor space than a single rear dormer.

For this Greenwich project, the larger area became the master bedroom, while the smaller section accommodated the wet room.

Explore L-shaped dormer conversions →

What is a wet room?

A wet room is a bathroom where the shower area is waterproofed and water drains directly through the floor, rather than into a separate raised shower tray.

The floor needs to be prepared with the correct slope and waterproofing so water drains away properly.

For this project, we installed a walk-in shower without a step, with the drain built into the tiled floor.

Read our wet-room guide →

What is a temporary roof?

A temporary roof, often called a “tin hat”, is a weatherproof covering installed above the scaffolding to protect a house while its existing roof is being opened or rebuilt.

It can reduce interruptions caused by rain and help protect the rooms below.

It adds to the scaffolding cost, so whether it’s worthwhile depends on the project, the season and how much of the existing roof needs to be removed.

For this project, the scaffolding didn’t include a temporary roof, and winter rain contributed to around two weeks of interruptions.

Read our guide to temporary roofs during construction →